Setting up a SharePoint site to share files with external parties or users is one of the most common requests. To start it is worth confirming the default settings for external Sharing. In the SharePoint Admin Centre go to Policies -> Sharing. Settings here apply default permissions to all Sharepoint sites and users personal OneDrives’. Depending on the security policies framework adhered to the default setting, which enables easy and convenient sharing, can be amended to be more restrictive.
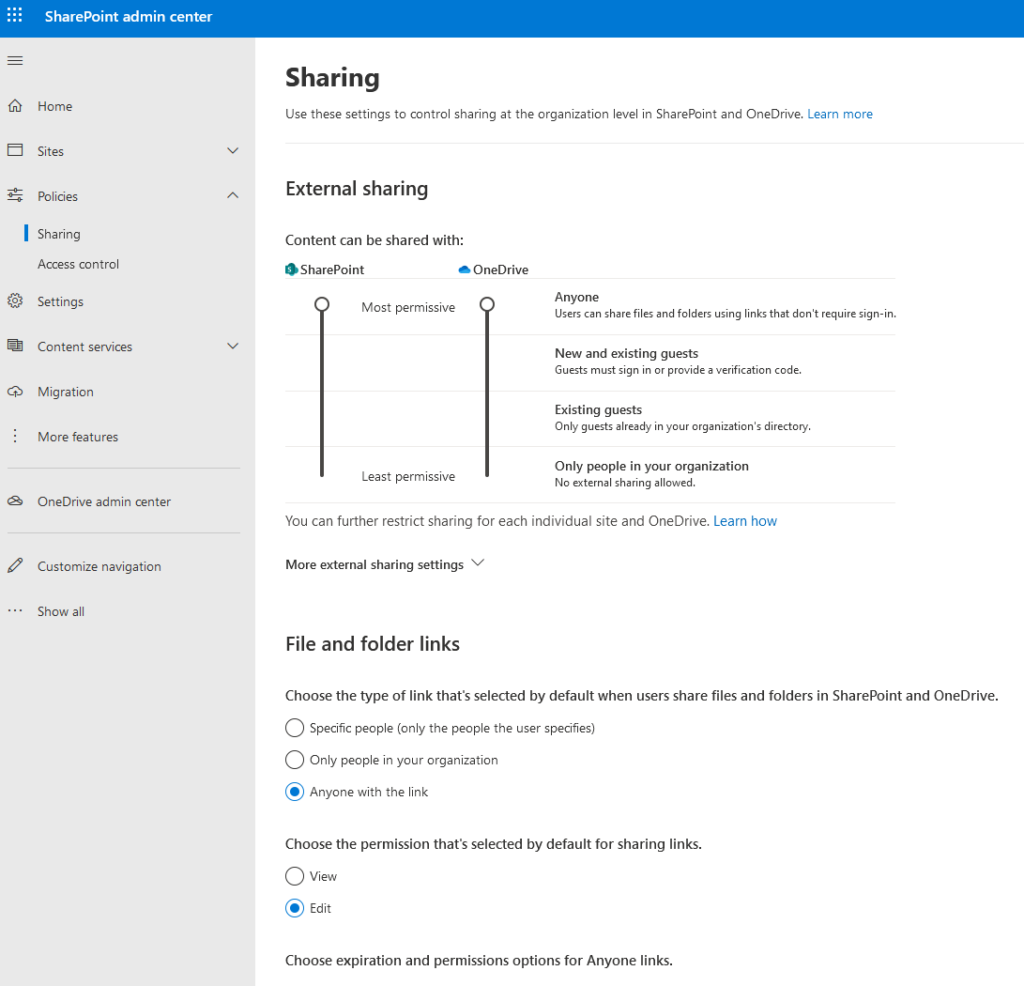
Be aware that these setting apply globally to all Sharepoint sites and users OneDrives’ and by default, the most restrictive permission will be applied. Next is to check the wether users in your organisation can add guests and share content. Go to the Microsoft 365 Admin Centre -> Setting -> Org Settings -> Security & Privacy and verify that you prefered option is
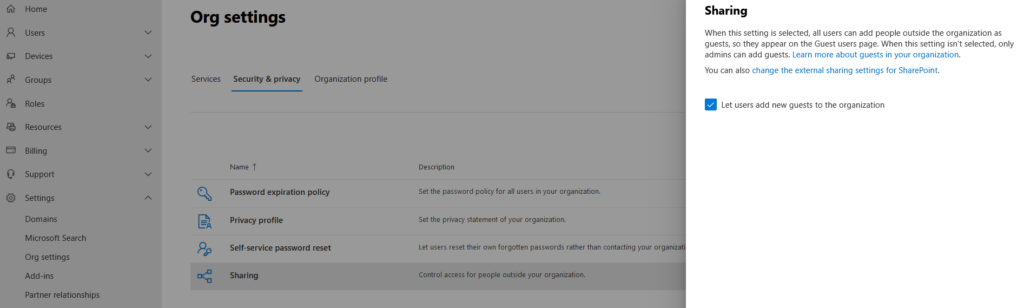
enabled or disabled. Once this is done we can proceed to create the SharePoint site. SharePoint offers a number of templates to create a new site. The default option is to create a Team site but there are also templates for Document Center, Enterprise Wiki and Publishing Portal. All templates are accessible via the SharePoint Admin Center -> Create -> Other options.


As we are looking at setting up a secure SharePoint site to share files externally it is advisable limited and tailer the features available on the SharePoint site to just what it is needed, in our case Document Center is the appropriate choice. After giving the site a name and assigning the Primary administrator it is advisable to expand Advanced setting and set the appropriate Time zone. After we have clicked on finish the site will be created and it might take a few moments before the site is available in the SharePoint Admin Center. Once the site shows up, from the top menu choose Permissions -> Manage Admins. The best practice is to have two (but for more, there has to be a justification). Add an additional Administrator and change the Primary Administrator if needed. Next click on the site name. This opens a blade that allows some customisations for the new site. We are particularly interested in the Policies tab and from there click on Edit under External sharing. The Sharing screen will have some familiar options available to us. To impose the tightest security we select “Existing guests only”. This implies that guests have to have an account in your AAD, either created by an Administrator or have been previously granted access to another Sharepoint Site, OneDrive or Teams belonging to your organisation. To facilitate external users to use the entire site the same way we change the Default sharing link type to  People with existing access. The next steps are to open the new Site -> Site Contents and to create a new Document Library. Next, we have a look at Site -> Settings -> Site Permissions. Here we click on Site Sharing -> Change how
 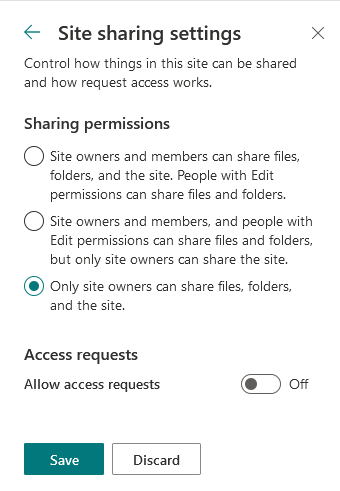 members can share. Here we are restricting the sharing option to only have site owner share files and folders. This remove the capability of daisy-chain sharing permissions.